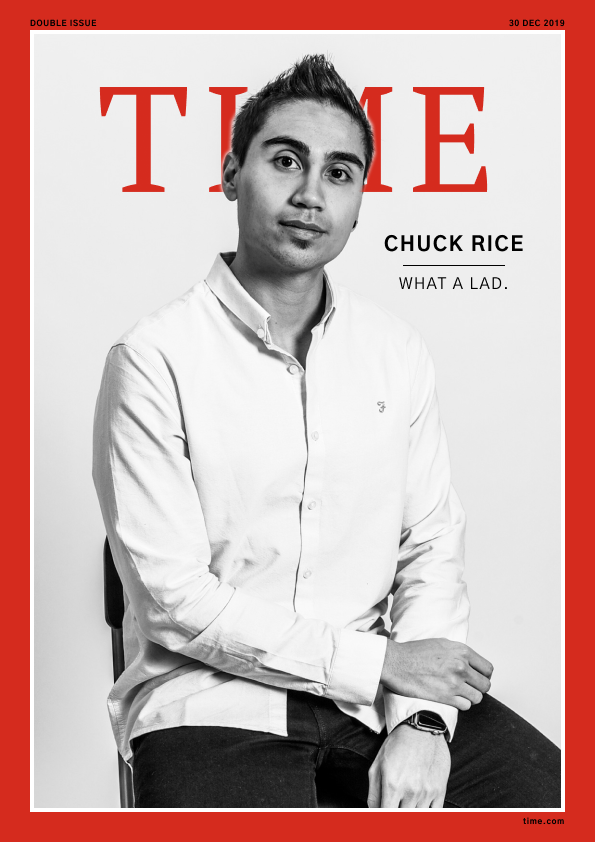
How to get on the Cover of TIME magazine
I recently applied to a call for models on a Facebook advert I saw just to see if they would bite, and they did! My experience taught me not just about the funnel of acquiring customers for digital products I work on, but I thought I'd have a bit of fun with the photos that I now had the rights to. I'm going to show you how I created this in about 30 minutes in Figma—my tool of choice.
Getting Assets and Examples
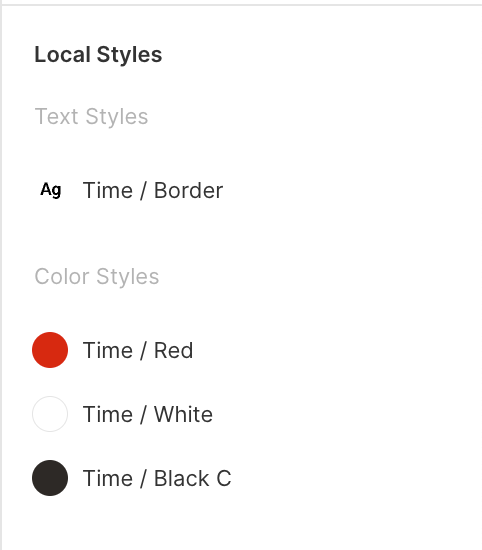
Style Guide
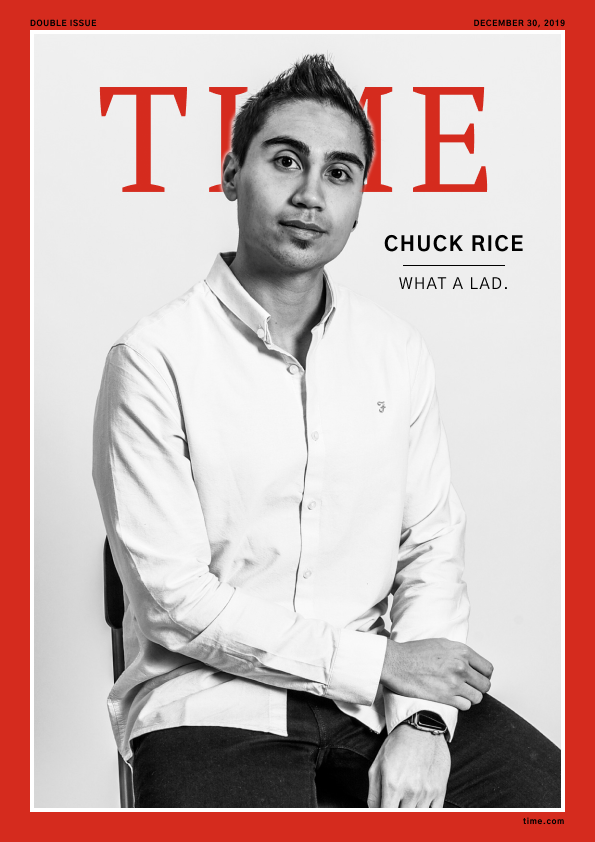
This is where every designer should start, or in a design system when it comes to designing software. Find what exists and use that to your advantage! A quick Google revealed this PDF. The design language and logo have moved on a little bit from the classic covers we know and love, but it had the exact colours I needed to recreate the frame.
https://www.timeinc.com/wp-content/uploads/2016/07/LIFE-Style-Guide.pdf
Live Examples

Find an example to base your work off of. Designers don't work from memory, we remix real tangibles using our crafting skills. Above is the copy of Donald Trump's 'Person of the Year' cover. As you might have noticed there's already a bit of a difference between this one and my gag, but did you notice the differing date format at the top before comparing the two side by side?
Thought so 😉.
Fonts
This is the trickiest part. Now, I don't have any Adobe products or fonts so I had to make do with alternative free fonts. A bit of Googling alternatives to Proforma and Folio Std revealed PT Serif for the TIME logo and Gothic A1 for the body font as decent alternatives.
Assembling the Cover
Creating the Frame
The easy part is importing the picture I wanted to use and drawing a frame. It's a couple of rectangles using the flagship red together with a white trim on the inside. Creating the font took a bit of tweaking to change the spacing to look right and then creating that text as a new Local Style in Figma. Below you can see the final styles I put together for the cover.
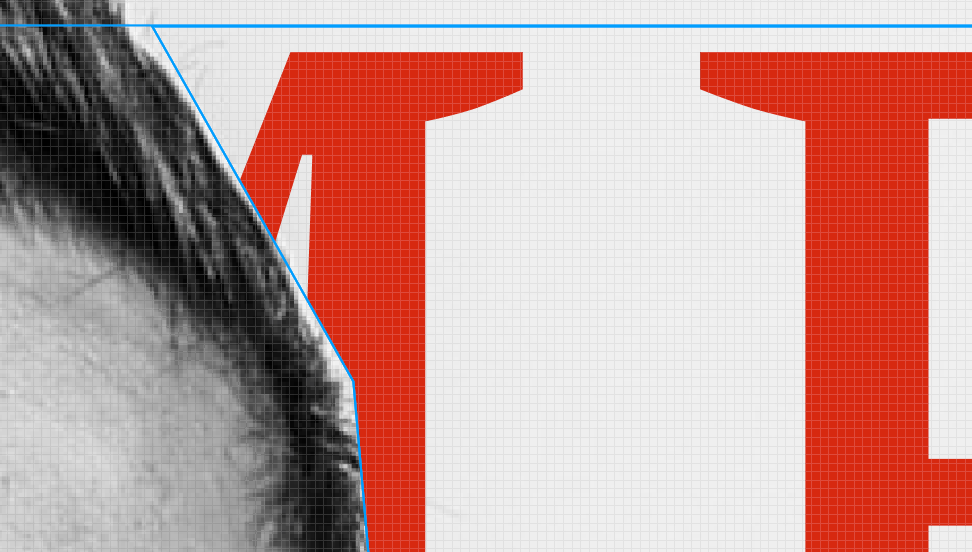
Creating the TIME logo
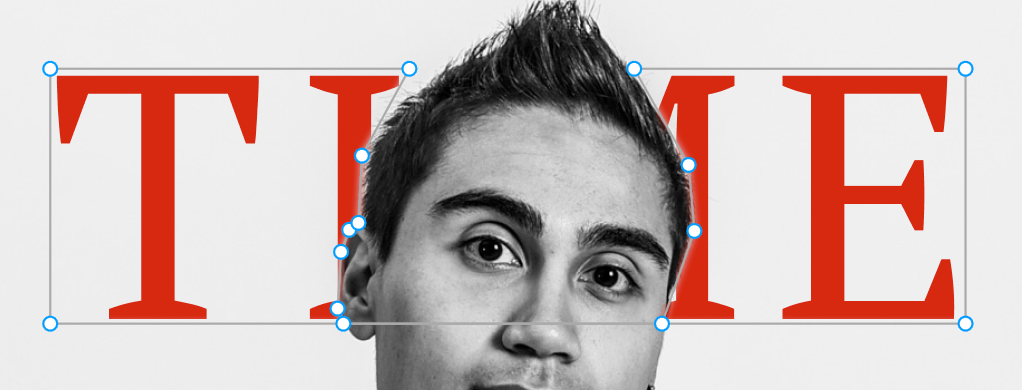
This was the trickiest bit but wasn't as difficult as I thought it would be. First I created the text and adjusted the size until it looked right. Next I knew I would need a mask, and made a rectangle. Double-clicking it will let you adjust the points and allow you to create more points between each edge. I carefully traced around my head until it created a believable silhouette. Group the rectangle, the text and apply a 'mask' transformation (middle of your top control bar, or Option + Cmd + M) et voila.
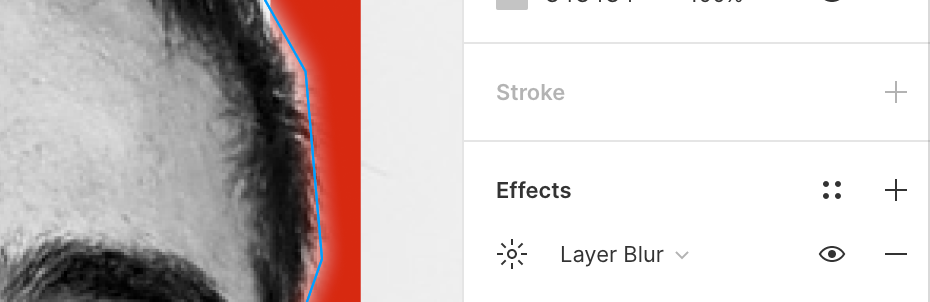
What was the solution to get the edges softer? Apply a 'Layer blur' effect to the rectangle mask layer. The default settings were good enough. Simples!
Finishing Touches
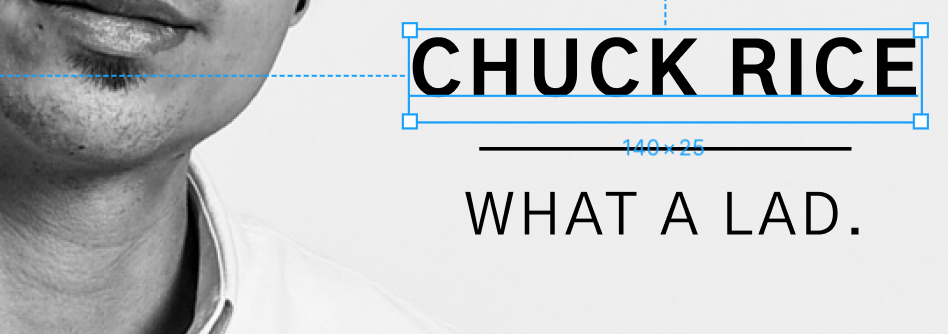
Along the bottom is a small 'time.com' stamp, plus all the covers usually had some piece of copy to get across a teaser for the article inevitably written inside. Here I decided to use a heavier font weight for my name, and a lighter weight for the text underneath. Short, sweet and to the point!
Conclusion
As long as you're using the tools correctly and have spent a decent amount of time using tools for a specific purpose, you can create anything. This was for fun and to flex my design skillset, but when crafting prototypes or artefacts for Design Sprints or conducting user research it's all possible. It just takes some ingenuity, creativity and you can make anything believable.
Thanks to @_beingamodel_ and big thanks to the photographer Laura (sorry I don't have your social, but you were an absolute pleasure to work with).
Liked this? Forward to a friend, subscribe to my newsletter, Medium, YouTube, or become a Medium member to support my writing (and other writers, too!).